Blog
How to Handle an Emergency Plumbing Situation Before the Pros Arrive
Burst Pipe at 2 AM? What to Do Before the Plumber Arrives
A pipe just burst or your water heater is leaking. Here are the exact steps to limit damage before professional help gets to your door.
That sound changes
everything. The rush of water where water should not be, usually around 11 PM
on a Sunday. Most homeowners freeze for about ninety seconds before they
remember they have no idea where their main shutoff valve lives. That ninety
seconds costs them drywall, flooring, and sometimes thousands of dollars. You
can do better. The gap between discovering an emergency and the moment a
professional walks through your door is usually thirty to sixty minutes, and
what you do in that window decides whether this is a $300 repair or a $6,000
remodel. Here is the playbook.
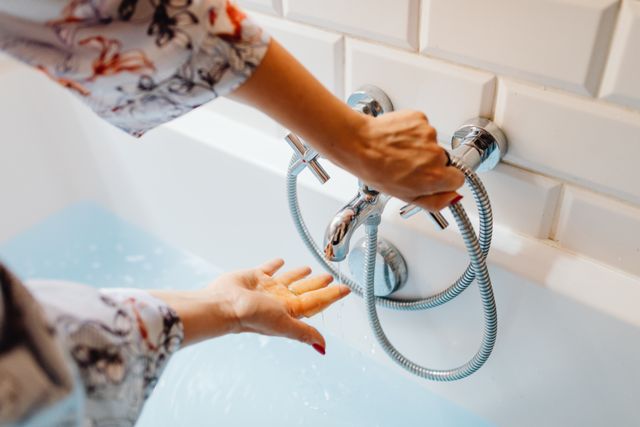
Photo by https://kaboompics.com/
Find Your Shutoff Valves Before You Ever Need Them
Nobody reads this section after a flood. They read it
weeks before, and then they forget it, and then they need it. So do this right
now: walk your property and locate every shutoff point. You have three tiers to
know, and most people only know one of them.
Your main valve sits where the city water line enters
your home, usually near the water meter in a basement, crawlspace, or an
outdoor pit box. This one kills everything, and it is your nuclear option. Your
fixture valves are the small oval or lever handles directly under sinks and
behind toilets. These isolate a single problem area without cutting water to
your whole house. Your water heater has its own valve on the cold water inlet
line, plus a temperature and pressure relief valve that you should test twice a
year.
Here is the naming trick
that saves you during panic: call them the red valve, the blue valve, and the
silver valve based on what you can see when you crouch down. When your brain is
screaming and water is pooling, remembering a color is easier than remembering
"the 14mm gate valve on the east wall." Write those color names on a
sticky note and put it inside your kitchen cabinet door. Take the extra minute
to actually turn each valve a quarter turn and then back. A valve you have
never moved in eight years can seize up exactly when you need it most.
The First Three Minutes: Shut Off, Then Assess
Water is pouring out. Your instincts will tell you to
grab a mop or start moving furniture, but both of those are wrong. Your only
job in the first minute is stopping the flow. If the leak is at a specific
fixture, close that fixture valve. If you cannot tell where it is coming from,
or water is coming from the ceiling, go straight for the main valve. Turn it
clockwise until it stops. For ball valves with a lever handle, the lever should
sit perpendicular to the pipe when closed.
Once the water stops, you can think. Grab a flashlight
and find the actual source. Is it a visible pipe joint, a leaking water heater
base, or water running down a wall from above? This assessment matters because
it changes what you do next. A pinhole leak in an accessible pipe can take a
temporary patch. A failing water heater cannot be patched at all, and you need
to know that before you waste twenty minutes trying.
Now turn on a cold faucet on
the highest floor of your home and a hot faucet on the lowest floor. This
drains the remaining water from your lines and relieves pressure. Pressure is
your enemy right now. Every pound of pressure left in the system encourages
more water to find the path of least resistance through your new hole.
Stop the Damage While You Wait
With the water off, you shift from stopping the cause to
containing the effect. Move anything valuable out of the splash zone first.
Furniture, electronics, rugs, cardboard boxes stored on the floor, all of it
goes to dry ground. Then lay down towels at the perimeter of the water, not in
the middle of it. You are building a dam, not mopping a floor. Push water
toward a floor drain if you have one, or toward an exterior door where it can
run out safely.
For ceiling leaks, poke a small hole with a screwdriver
or nail right at the center of the sagging area. This feels counterintuitive,
like you are making the damage worse, but you are not. A gallon of water
sitting in a sagging ceiling weighs about eight pounds, and that weight
eventually pulls the drywall down in one massive sheet. A pencil-sized hole
lets the water drain into a bucket in a controlled stream instead. The drywall
patch you will need later is far cheaper than replacing a whole ceiling section
that collapsed.
Document everything with
your phone. Take photos of the source, the water spread, and any damaged
belongings before you move them. Insurance adjusters work from evidence, and
your memory of "the rug was wet" does not carry the same weight as a
timestamped photo of the rug sitting in two inches of water.
What You Can Patch, What You Cannot
You need to be brutally honest with yourself in this
moment. Some things take a temporary fix gracefully. Others do not.
A leaking pipe joint can sometimes handle a temporary
clamp or pipe repair tape, the self-fusing silicone kind, not the basic
electrical tape from your junk drawer. Wrap it tightly, extending an inch past
the leak on both sides. This will not fix the pipe, but it can slow a drip to
nothing while you wait. A cracked toilet base or a leaking water heater is a
different story. These failures mean the unit is compromised, and no tape on
earth resurrects a rusted tank. If you have a water heater leak, shut off its
supply valve and its gas or power immediately. A water heater that has dumped
its contents will burn out its heating elements in minutes if left powered.
Frozen pipes deserve special
mention because they explode dramatically when they thaw. If you have a frozen
pipe, meaning no water comes out of a faucet and the pipe feels ice cold, you
open that faucet slightly and apply gentle heat with a hair dryer, starting
closest to the faucet and working backward. Never use an open flame. And never,
ever ignore a frozen pipe hoping it sorts itself out.
Know What You Are Calling For
When you make the call to a professional, you have
exactly one chance to give them the information that changes their response.
Most people say "my basement is flooding," which tells the dispatcher
nothing useful. Instead, say this: the source, whether you have stopped the
water, and how long the water ran. "I have a burst pipe in the kitchen
ceiling, water is off at the main, and it ran for about ten minutes" gets
you a different response than a vague panic. The company can send the right
tech with the right parts on the first trip instead of a diagnostic visit
followed by a supply run.
Ask what the dispatch fee
covers and whether the tech carries common replacement parts on the truck. Some
companies charge a trip fee that applies to the final bill if you hire them,
and others charge it regardless. You want to know this before the truck rolls,
not after. If the emergency is at 2 AM, ask about overtime rates up front so
there are no surprises on the invoice. For homeowners in the Abilene area who
need a rapid response, searching for abilene tx plumbers will pull up local options
that understand the regional pipe and water issues, though the fundamentals of
emergency response stay consistent everywhere.
The Aftermath Checklist
Once the immediate crisis passes, the real work begins,
and it is easy to skip steps when you are exhausted. Keep this sequence handy.
●
Run dehumidifiers and fans for a minimum of 72
hours, not until the carpet feels dry to the touch. Moisture hides in
subflooring and wall cavities, and that hidden moisture is what grows mold.
●
Toss anything porous that got saturated, like
drywall, insulation, and carpet padding. Trying to save these invites mold and
structural damage later. Non-porous items like glass, metal, and sealed wood
can often be cleaned and kept.
●
Photograph the damage after drying, not just
during the event. Many insurance claims need documentation of the full extent,
which is only visible once everything is dried out.
●
Call your insurance company within 24 hours,
even if you think you will not file a claim. Reporting preserves your options,
but waiting can create coverage disputes.
●
Schedule a follow-up inspection of the repaired
area after a few weeks. Look for discoloration, soft spots, or a musty smell.
These are the ghosts of incomplete drying.
The Environmental Protection Agency estimates that
prompt drying within 24 to 48 hours of a water event significantly reduces the
likelihood of mold growth taking hold in a home. That timeline is your target,
not a suggestion. Every hour you spend running air movers now is a month you do
not spend dealing with remediation later.
Here is the part most people miss entirely. The average
home experiences some form of water damage that leads to a claim roughly once
every decade, according to data compiled by the National Center for Education Statistics in
its review of household expense patterns, which means this is not a rare freak
event. It is a predictable cycle of homeownership, and the difference between a
minor disruption and a major catastrophe is rarely the pipe itself.
It is the ninety seconds of panic before you remember
where the shutoff valve lives. So go find that valve today, name it something
you will remember, and make sure everyone in your house over the age of ten
knows how to turn it. You might never need it. But if you do, you will be the
calm one in the room telling everyone else exactly what happens next.
One more thing worth saying. After the repair is done
and the drywall is patched and the floor is dry, spend the twenty dollars on a
cheap moisture meter and check the surrounding area monthly for a few months.
Water damage does not always announce itself immediately, and catching a slow
issue early is the difference between a weekend project and a complete redo.
Your home will thank you, and so will your bank account.
What is the one shutoff valve in your house you have
never actually tested?
Photo Gallery


Comments